Step-by-Step Pinstripe Illustration
Mechanic’s Creeper Pinstripe Illustration in Alpha 6 Enamels
Step 1:
For this Step by Step Pinstripe Illustration piece of art, I’ll be painting a vintage wood mechanic’s creeper that I’ve lightly sanded and painted with an oil-based brush-on clear coat from Alpha 6 Corporation. It’s important to thoroughly clean the surface you’ll be painting with a degreaser. Depending on the surface you choose to paint, you may use denatured alcohol, wax and grease remover, or just plain window cleaner and a paper towel to clean the area you will be painting. Before you wipe the entire surface, choose a discreet area to test the cleaner of your choice to be sure it doesn’t affect the canvas surface in any way. Prepping the surface for paint by cleaning it is the most important step for proper adhesion of the paint and longevity of the art work.

Step 2:
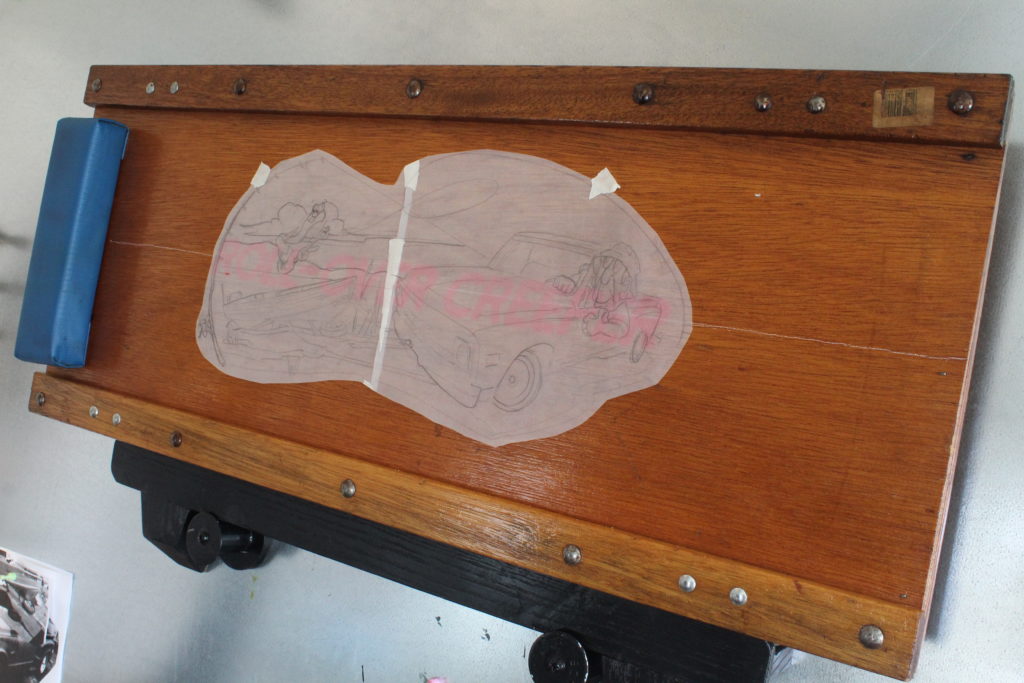
For this step, I’ll be using Strathmore Tracing Paper, but you may use any kind of paper to create your initial drawing. Measure the space you want to paint and draw your design to size on a separate piece of paper with a pencil. If you draw something and need it to be enlarged before transferring it to the surface for paint, take it to a local print shop and have them enlarge and print the design on drafting paper. For this project, my customer wanted to illustrate his truck and its original owner who used to push his fishing boat into the lake using the front bumper hitch he welded on for towing ease in his old age. All of my initial sketches are drawn on transparent tracing paper to help me align the final line drawing onto my “canvas” when it comes time to transfer the design over for paint.

Step 3:
I then tape the final line drawing to my clean dry surface I’ve prepped for paint. I usually use a slightly less tacky tape such as old masking tape or painters tape as to not damage the painting surface or leave sticky residue. You will want to tape the drawing in the exact location of where you want the design to be. Remember, we are transferring the design with chalk, which means if you accidentally place the design off center or feel like you need it to be a different size once you’ve traced over everything, you can just take off your drawing and transfer paper, wipe off the chalk with a soft towel with water, and start over.

Step 4:
To transfer the paper drawing to another surface, we will be using Saral Paper. This kind of paper has chalk on one side which can be used to transfer a pencil drawing on paper onto any metal, glass, plastic, wood, or canvas surface. The rolls come in an array of different colored chalk options for versatility. For the mechanic’s creeper I am using white chalk Saral paper. There are two ways to utilize the Saral paper transfer method. With both methods, you will want to be sure that the chalk-covered side of the paper is up against the surface you will be painting to get an accurate transfer.
For my fishing illustration, I slide a section of the Saral paper roll under the taped down drawing and start to trace over my design with a pencil. Everywhere I press down on my pencil will transfer the lines in chalk onto the wooden creeper. As you work your way across the drawing, tracing over your lines, you can move the roll of Saral paper lightly under the design. I use this way of transferring art with Saral paper for large designs like this because I can save the Saral paper roll and use it a few more times before the chalk on the back is gone. For smaller designs, you can cut out your drawing and the Saral paper to match, tape the cut-outs together and then tape them down to your surface and begin tracing.
A helpful tip while tracing your drawing, especially for large or detailed designs, is to use a different colored pencil to trace the design so that you can see where you’ve traced and where you haven’t.

Step 5:
Slowly remove your taped drawing from the surface to reveal a perfectly transferred line drawing in colored chalk on your painting surface! If you take off the Saral paper and your sketch and realize you forgot to trace a shape or a line, you can reference your sketch and draw in the line lightly with a Stabilo pencil. I used to draw entire designs with these wax pencils on all kinds of surfaces but found they can leave ghost lines that are hard to get rid of!

Step 6:
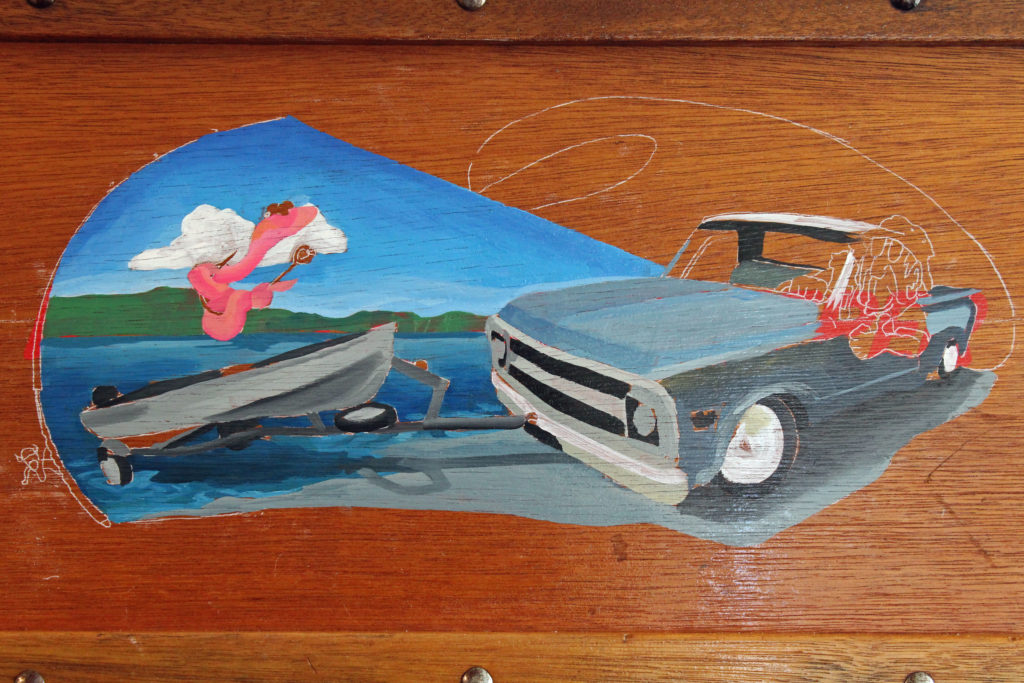
For steps 6-8, I’ll be using Alpha 6 Corporation enamels, Alpha 6 high-temp reducer, generic paint thinner, and a magazine paper pallet. Tidwell’s Broken Pinky and Monster Stix brush sets by Mack Brush Co. are my favorite for illustrative designs like this old man fisherman. For this piece, I quickly paint in the large areas with the Broken Pinky Scrubby brush and thinned down enamel colors. My goal is to cover the illustration with color, not worrying about any small details or shading at this time. Do not be afraid to paint over the chalk lines. The enamel paint will hide them without any issue. Conversely, if you still have visible chalk lines at the end of the painting, wait for the work to dry completely (I wait 24 hours to be safe) before wiping over the painted design with a water-dampened soft towel.

Step 7:
After the first layer of paint is dry, I choose an imaginary light source to determine the locations of my highlights and shadows. To shade a paint color, I mix a contrasting color into the paint on my magazine pallet. For example, if I want a dark red color, instead of adding black to my pigment, I add green which is the contrasting color of red. You’ll have to have some basic knowledge of the color wheel to successfully shade colors in this way. For highlights, you can add white to any color to get a lighter color. Because enamel is known to dry pretty quickly, mixing colors and shading shapes can be a little tricky. You don’t want the shading to look clumpy. To avoid this, work in very small areas at a time and add paint thinner and/or reducer to your colors on the magazine pallet before applying paint to the final surface.

Step 8:
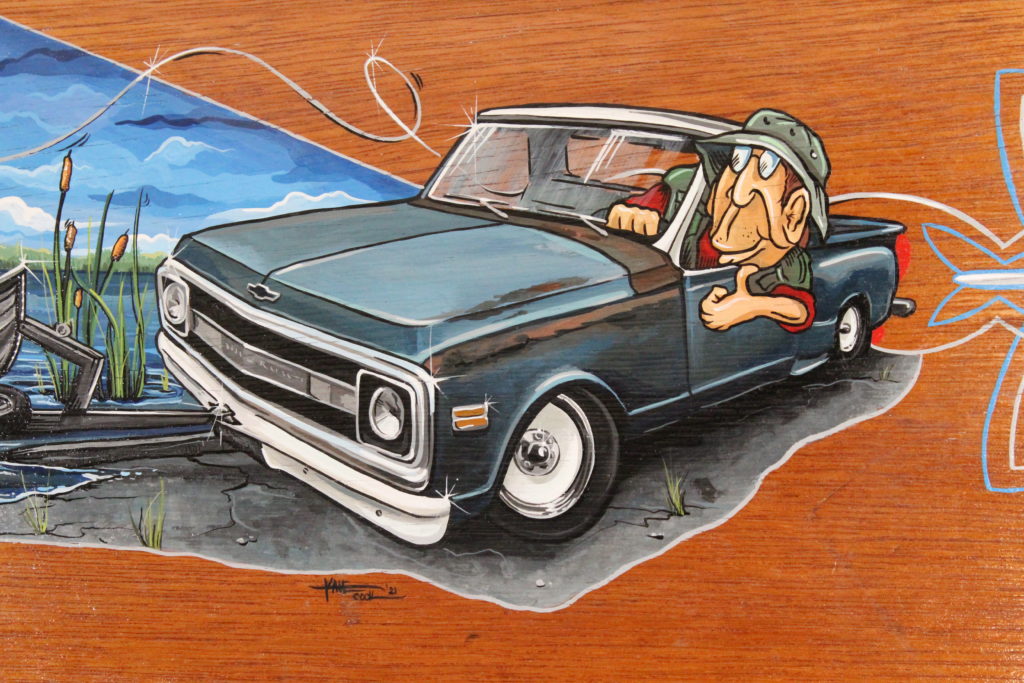
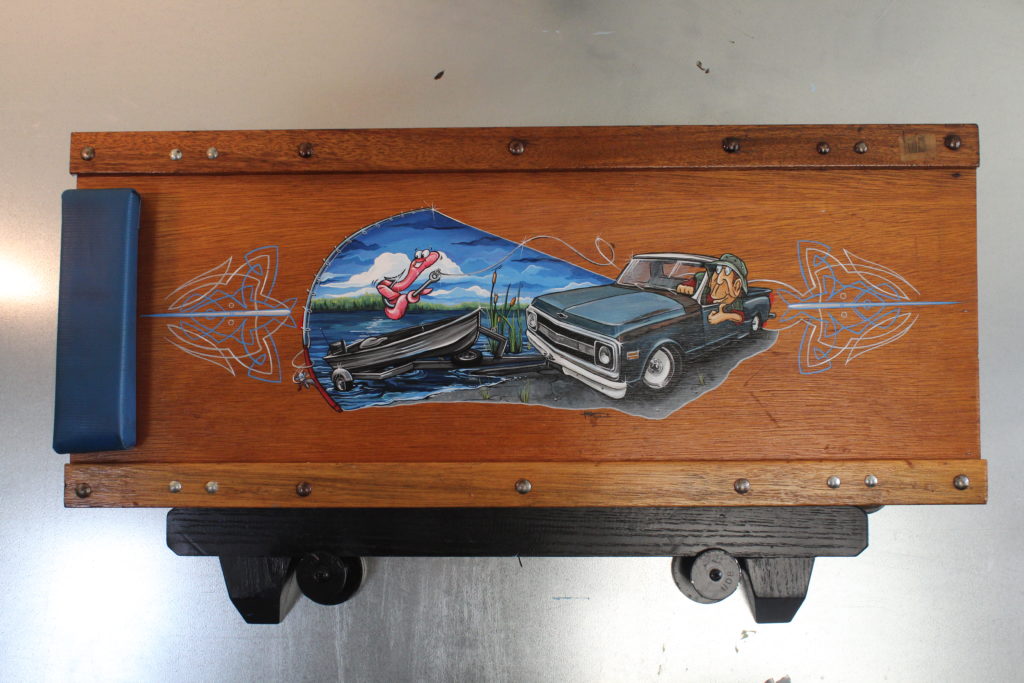
Once your second coat of paint is dry, hopefully your illustration is starting to have a 3D look thanks to your shading! Now you’re ready for my favorite part; the black outlining and white highlighting. For this step, I switch up my brushes to The Virus Set by Mack Brush Co. With a 444-1 size Virus brush I outline almost everything in black and add a few bright white highlights. You may want to thin the enamel down with paint thinner and/or reducer on your magazine pallet to give your paint an even flow off the bristles of your brush. You can outline as much or as little as you want. However, you will want to be more sparing with where you add in your white highlights. Remember where your imaginary light source is coming from and add highlights accordingly. With my Virus brush I also add in some freehand pinstriping on either side of the artwork.

Step 9:
Finally! The custom painting is complete. Be sure to clean your brushes with paint thinner and then Mineral Spirits. Dip the bristles in some motor oil and work the oil into the bristles all the way up to where they enter into brush handle. Store your oiled brushes in a covered brush holder. If you have the time, wait to wipe off any remaining visible chalk on your final painting for 24 hours. This ensures that each layer of the paint has had the proper time to cure. Last, but not least, you can spray some water on a soft paper towel until its lightly damp and wipe over the art to remove any excess chalk lines or fingerprints.

These designs are owned by Asphalt Canvas Custom Art © and may only be used for practice. They are not allowed to be reproduced and sold in any way.
________________________________________________________________
Some of the links in this post are affiliate links. This means if you click on the orange links and purchase the item, I will receive an affiliate commission at no extra cost to you.
All of the suggestions on the Asphalt Canvas Blog are purely my opinion, however, they were formed from a favorite experience or helpful use of a high-end product in my own professional art practice and business.
________________________________________________________________

Leave a Reply