My Custom Art Easel Build

As I started to research different art easels on the market place, I quickly realized that even the high dollar easel styles would not accommodate the wide variety of heavy metal and irregular objects on which I normally paint. Instead, I started to take notice of the different easels my favorite automotive artists were using on social media and collected inspiration for easel design by looking up traditional sign painter studio set-ups. As a result, my dad and I brainstormed a custom, heavy-duty easel that would function well for the many different types of “canvases” I paint on, including car doors and rims, as well as traditional canvas panels.


After my dad saw the reference photos I had collected and listened to some of my ideas about the design, he lovingly offered to help build my dream easel. For those that don’t know, my dad is a very talented craftsman with wood, metal, and machinery. We spent a couple weeks sketching out different potential designs for the easel and gathering measurements for the custom build. (We had to make sure it would stay within the measurement of the studio door frame!)

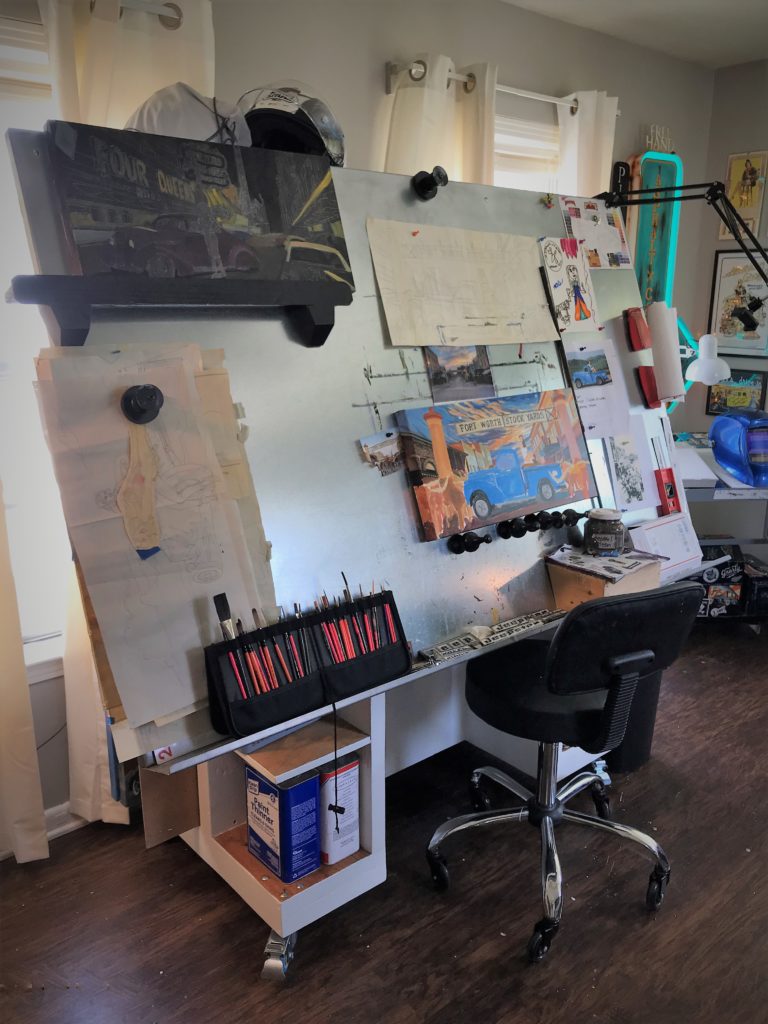
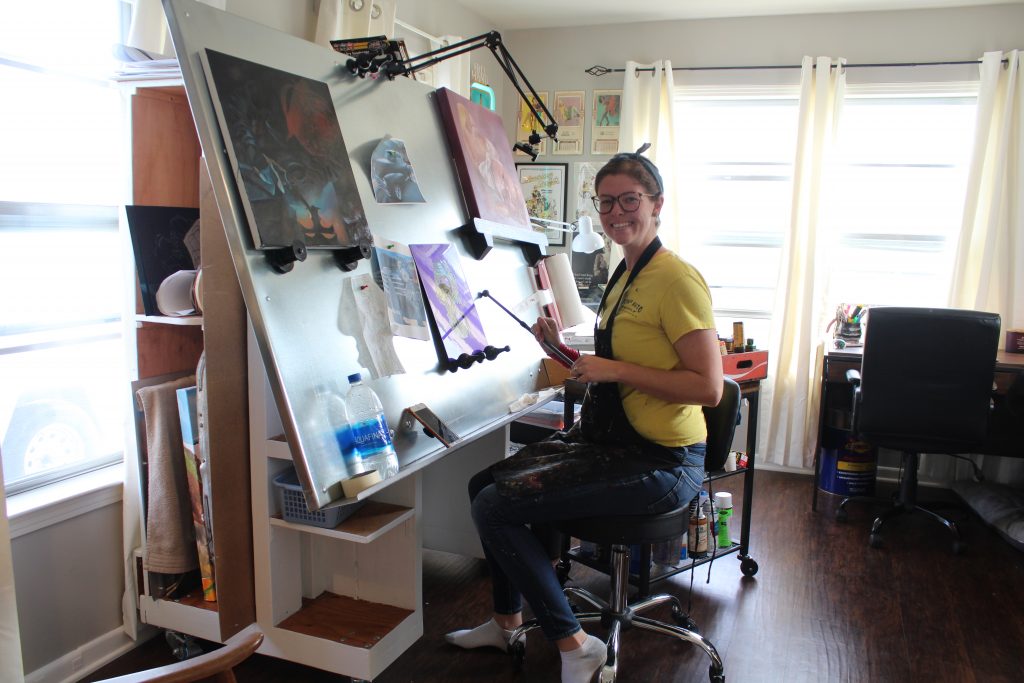
My wish was to have a large metal easel surface where I could sit or stand at to paint. I wanted to be able to use magnets to position different canvases on the easel with ease. When we saw how much space the magnetic easel board and base we had designed would potentially take up in my small studio space, my dad had the genius idea of making the easel base multifunctional by adding different sized storage shelves for canvases.
Custom Easel Surface:
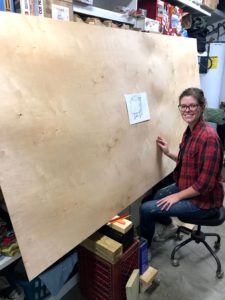
After we finalized the measurements and design, we purchased all the lumber required to build the shelving base of the easel. The first step was to sandwich two 6×7 foot pieces of plywood together with wood glue and a staples. After letting that cure overnight, the plywood “sandwich” was moved to a local metal shop in Temple, Texas, called Tin Knockers Sheet Metal. They specialize in making custom hood vents and metal countertops for industrial kitchens. They wrapped the plywood sandwich in a sheet of magnetic steel and bonded it to the plywood. They also created and attached a custom steel shelf that ran the length of the easel surface at the bottom. I had them make sure the shelf would be wide enough to hold the essentials: my coffee cup and brushes.

Custom Easel Base:
While the metal surface was being built at Tin Knockers, my dad built the custom shelving box that would act as the base for the metal easel surface. We used the door measurement of my studio as max measurements for the overall design. The easel needed to be as large as possible, but still fit within the door of the studio. Shelves were designed within the base at multiple heights and widths to accommodate the wide variety of blank canvas sizes and metal objects I had collected over the years to paint. I sanded and painted the completed wood base with white house paint. My dad is the wheel castor king! He found some industrial strength castors with brakes online to add to the bottom of the shelving base.


After getting the metal easel surface back from Tin Knockers, we used an engine hoist (because it was about that heavy) to mount it onto the shelving box base with some industrial-sized bolts. I found retractable drafting table hinges on Amazon that we modified and added to the back of the magnetic easel surface. These hinges allow me to easily adjust the angle of the entire easel board depending on what project I’m painting.
Working on the Easel:
We built the easel in my dad’s shop and trailered it over to my studio. The shelving base and the easel board can be unbolted and slid together through the back shelving portion of the base for easy transport.
I have been using the easel in my studio for over 5 months now and have fallen even more in love with its multi-functional abilities. The storage aspect of the easel has been so convenient and time saving. I can easily see and access the different canvases I have purchased and my investments stay protected from getting damaged in their own little cubbies. The magnetic surface of the easel is my favorite part! I can position inspiration and/or reference photos adjacent to my current project with a magnet and move them around with ease. The easel is more than strong enough to hold heavy or oddly shaped objects like the vintage mechanics creeper or car rims I just finished painting. I am so incredibly humbled by the craftsmanship, time, and love my dad (and mom) poured into the build of this easel. I look forward to see the artwork that will be created on it in the future.

If you have any questions regarding the build of your own easel in a similar style, let me know in the comments or shoot me an email! I would love to help you in any way! As for the exact build plans of this easel, there are none, but I hope if you’re looking to build an easel of your own, these photos and ideas will spark your imagination and help you in some way.


Dad says you’re a sweetheart!